Configuring BGP on FRRouting
Most networking devices1 use a command-line interface (CLI) to interact with end users. The CLI usually provides show commands to inspect the state of the device and a configuration mode that allows the user to configure the device.
FRRouting is different. It’s a control-plane solution that uses an application/management layer on top of Linux, with the Linux shell as the initial CLI. To configure FRRouting, you have to:
- Use standard Linux tools like ifupdown to configure the interfaces (netlab will take care of that);
- Edit FRRouting configuration files to start routing protocol daemons
- Start FRRouting configuration shell from the Linux CLI.
The Linux interfaces and IP addresses will be automatically configured when you start the BGP labs with the netlab up command. You will need to start the routing protocol daemons in the initial lab exercises if you plan to use FRRouting virtual machines as the user routers, and you may need to run show commands on the FRRouting nodes acting as external routers. You’ll practice both in this lab exercise.
Start the Lab
You can start the lab on your own lab infrastructure or in GitHub Codespaces (more details):
- Change directory to
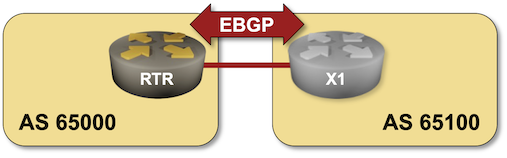
basic/0-frrouting - Execute netlab up to start a lab with two FRRouting virtual machines or containers (depending on your lab setup).
- Log into the devices (
rtrandx1) with the netlab connect command.
Check the FRRouting BGP Daemon
Most network devices start routing daemons when you configure them through the configuration CLI or API. FRRouting is different: you have to enable the desired routing daemons in a configuration file and restart the top-level FRRouting process.
The easiest way to find FRRouting daemons is to use the ps -ef | grep frr command. This is the printout you could get when the BGP daemon is already running:
rtr(bash)#ps -ef | grep frr
    1 root      0:00 /sbin/tini -- /usr/lib/frr/docker-start
   26 root      0:00 /usr/lib/frr/watchfrr -d -F datacenter zebra bgpd staticd
   41 frr       0:00 /usr/lib/frr/zebra -d -F datacenter -A 127.0.0.1 -s 90000000
   46 frr       0:00 /usr/lib/frr/bgpd -d -F datacenter -A 127.0.0.1
   53 frr       0:00 /usr/lib/frr/staticd -d -F datacenter -A 127.0.0.1
  342 root      0:00 grep frr
Start the BGP Routing Daemon
The list of FRRouting daemons you want to enable is stored in the /etc/frr/daemons file. If you have to enable the FRRouting BGP daemon in FRRouting virtual machines:
- Add the
bgpd=yesline to the/etc/frr/daemonsfile2. - Restart FRRouting with the
sudo systemctl restart frr.servicecommand (see also: using sudo)
You cannot change the FRRouting daemons in FRRouting containers. Restarting FRRouting would kill the container. netlab takes care of that and enables all the daemons necessary to complete the lab exercises.
Warning
- Restarting FRRouting daemons wipes out the current (running) configuration. If you want to retain it, save it to the startup configuration with the vtysh write command.
- The write command saves the running configuration (that you can inspect with show running-config) into the
/etc/frr/frr.conffile. However, the show startup-config might not display the content of that file. Exit vtysh and use the more /etc/frr/frr.conf command3 to inspect it.
You could add the required line to the FRRouting daemons file with any text editor4 or use the following trick:
- Use sudo bash to start another Linux shell as the root user
- Use the echo command with output redirection to add a line to the
/etc/frr/daemonsfile.
rtr(bash)$ sudo bash
root@rtr:/# echo 'bgpd=yes' >>/etc/frr/daemons
root@rtr:/# exit
After enabling the BGP daemon and restarting FRRouting, you should see the bgpd process in the ps -ef printout or the BGP daemon mentioned in the sudo systemctl status frr.service printout.
Work with the FRRouting CLI
The FRRouting suite includes a virtual terminal shell (vtysh) that closely resembles the industry-standard CLI5. It must be started from the Linux command line using the vtysh command. The vtysh CLI must run as the root user unless you change the FRRouting permissions to allow a regular user to use it. The usual command to start the vtysh is thus sudo vtysh (but see also To Sudo Or Not to Sudo).
Starting vtysh on FRRouting virtual machines
rtr(bash)$ sudo vtysh

Hello, this is FRRouting (version 10.5.1_git).
Copyright 1996-2005 Kunihiro Ishiguro, et al.

rtr#
Starting vtysh on FRRouting containers
rtr(bash)# vtysh

Hello, this is FRRouting (version 10.5.1_git).
Copyright 1996-2005 Kunihiro Ishiguro, et al.

rtr#
Once you started vtysh, you can execute show commands to inspect the device state, for example:
x1(bash)# vtysh

Hello, this is FRRouting (version 7.5+cl4.4.0u4).
Copyright 1996-2005 Kunihiro Ishiguro, et al.

x1# show ip bgp
BGP table version is 1, local router ID is 10.0.0.2, vrf id 0
Default local pref 100, local AS 65100
Status codes:  s suppressed, d damped, h history, * valid, > best, = multipath,
               i internal, r RIB-failure, S Stale, R Removed
Nexthop codes: @NNN nexthop's vrf id, < announce-nh-self
Origin codes:  i - IGP, e - EGP, ? - incomplete

   Network          Next Hop            Metric LocPrf Weight Path
*> 10.0.0.2/32      0.0.0.0                  0         32768 i

Displayed  1 routes and 1 total paths
Tip
You can use the --show option of the netlab connect command to execute a single command on an FRRouting device. For example, to inspect the BGP table, use netlab connect --show ip bgp.
You can quote the show commands when they include characters that would confuse bash, for example netlab connect --show 'ip bgp regexp 65000$'
To configure FRRouting daemons, use the configure vtysh command and enter configuration commands similar to those you’d use on Cisco IOS or Arista EOS:
x1(bash)# vtysh

Hello, this is FRRouting (version 7.5+cl4.4.0u4).
Copyright 1996-2005 Kunihiro Ishiguro, et al.

x1# configure
x1(config)# router bgp 65100
x1(config-router)#
To Sudo Or Not to Sudo
The vtysh usually needs to run as the root user, so you should start it with sudo vtysh. Unfortunately, things are never as simple as they look:
- When using SSH, you log into FRRouting virtual machines as a regular user (user vagrant in netlab-created labs) and have to use the
sudocommand to start vtysh. - FRRouting containers run as the root user, and you connect to them as the root user with the
docker execornetlab connectcommands6. Start vtysh without using thesudocommand when working with containers7
Long story short:
- Use
sudo vtyshon virtual machines using FRRouting suite - Use
vtyshon FRRouting containers
Using Output Filters
Unlike many other network operating systems, FRRouting vtysh does not have output filters. You probably don’t need them, as you’ll be running FRRouting on a Unix-like operating system that supports pipes, but using vtysh in a pipe might be a bit convoluted.
To use the vtysh output in a pipe, you have to execute vtysh and get the results of a show command in a single command:
- You could use
sudo vtysh -c 'show command'when you’re in the bash shell of a lab device, for example:
$ sudo vtysh -c 'show ip bgp' | grep 32768
*> 192.168.100.0/24 0.0.0.0                  0         32768 i
- Alternatively, you could use the
netlab connect --showcommand to execute avtyshshow command on a lab device:
$ netlab connect x1 --show ip bgp | grep 32768
Connecting to container clab-originate-x1, executing vtysh -c "show ip bgp"
*> 192.168.100.0/24 0.0.0.0                  0         32768 i
Tip
Use netlab connect --quiet --show to omit the Connecting to... message.
The following table contains a mapping between common network operating system filters and Linux CLI commands:
| NOS filter | Linux CLI command |
|---|---|
include |
grep |
exclude |
grep -v |
begin |
grep -A 100008 |
end |
grep -B 10000 |
section |
no equivalent |
-
Including devices based on Linux, like Arista EOS, Cisco Nexus OS, or Nokia SR Linux ↩
-
See FRRouting Daemons Configuration File documentation for more details. ↩
-
viis available in FRRouting containers.viandnanoare available in FRRouting virtual machines. ↩ -
An euphemism for Cisco IOS CLI that is used when you try to avoid nasty encounters with Cisco’s legal team. ↩
-
When in doubt, use the whoami command. ↩
-
The FRRouting container does not include the
sudocommand. ↩ -
The ‘10000’ parameter specifies the number of lines after the match. Increase it for very long printouts ;) ↩